I started quilting during the pandemic, and I fell in love with it! I have made several quilts, but I seem to struggle on binding the most. I decided to try using some school glue to see if that would help me keep my corners crisp and binding somewhat even. It did! It really worked great.
Here was my process:
- I cut 2.5" strips of fabric (this quilt was a scrappy binding)
- Sew on the back of quilt 1/4" from edge. Iron and set the seams all the way around the quilt.
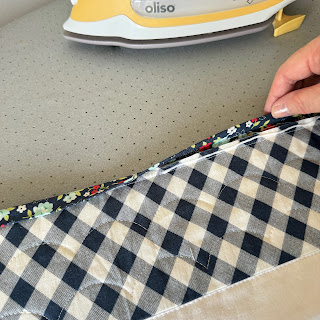
- Iron the strips going towards the front now. This step really helps to get the binding to fold nicely over.
- I found that I like to add the glue to the inside on the quilt edge rather than the binding. Do a few inches at a time, just a small bead. Then fold over binding and iron. Make sure you don't have any glue seeping out to protect your iron. The iron helps to get the glue to dry, but it isn't a super strong hold. Just enough to hold it in place.
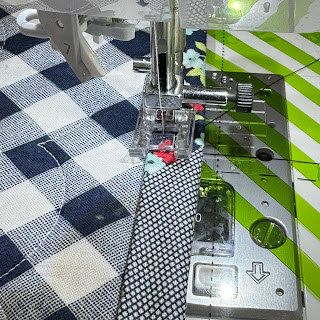
- I have a Juki DX-2000 and I like to use the "I" foot when sewing the binding. I line up the edge of the inside of my foot as shown below. You will see the stitches on the underside of the quilt, but mine did not get on the actual binding.
I did not have any problems with my needle or thread getting gummed up or having issues. You might want to test out this process on a smaller piece first.
I absolutely love how the quilt corners turned out! Probably the best corners I have had yet! I know my stitches are nowhere near perfect, and in fact, I tried using a scalloped ruler to quilt in the border area...so much to learn..definitely challenging. But, look at these corners!
Supplies Used (Affiliate Links):
- Glue - I like the non-toxic washable type.
- Where I Buy Most of My Fabric - This line is called Sunday Stroll by Bonnie & Camille so you can. maybe find some of it here as well.
- Iron
- Ironing Board
- Sewing Machine
- Sewing Machine Seem Guide
Thank you so much for reading and following my blog!


